Craving something sweet, creamy, and utterly indulgent—but without the gluten? You’re about to fall in love. Let me take you back to a rainy Sunday afternoon when my kitchen smelled like warm vanilla and toasted almonds. I was experimenting with dessert ideas for my newly diagnosed gluten-free niece. After several trials (and a few flops), what emerged from the oven was pure magic: a gluten free cheesecake recipe that didn’t just check all the boxes—it made everyone at the table ask for seconds. And yes, it’s freezer-friendly and beginner-approved!
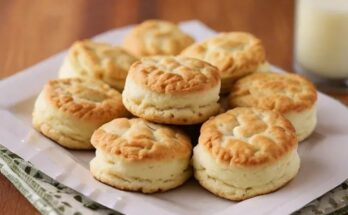
Want more sweet inspiration? Try our Gluten Free Biscuit Recipe or explore our Top Gluten Free Recipes for every occasion.
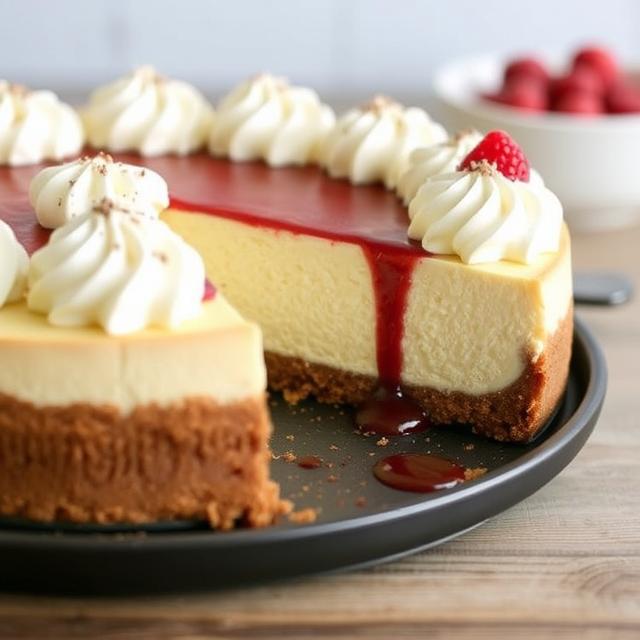
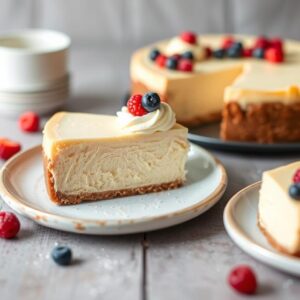
Why This Gluten Free Cheesecake Recipe Will Be Your New Favorite
This isn’t your typical dry, crumbly gluten-free dessert. We’re talking silky, tangy cheesecake with a melt-in-your-mouth crust that doesn’t fall apart. Here’s what makes it stand out:
- Creamy New York-style filling
- No water bath required
- Nut-based or cookie-based crust option
- Dairy-free friendly
- No special equipment needed
Best of all? Prep time is just 15 minutes, and there’s also a no-bake version for hot days.
Ingredients You’ll Need (Two Crust Options)
Option 1: Nutty Coconut Crust
- 1 ½ cups almond flour
- ¼ cup shredded coconut (unsweetened)
- ¼ cup melted coconut oil or butter
- 2 tbsp maple syrup
- Pinch of salt
Crust idea adapted from Gluten-Free on a Shoestring with a coconut twist for added depth.
Option 2: Cookie Crumb Crust
- 1 ½ cups gluten-free graham crackers or cookies, crushed
- ¼ cup melted butter
- 1 tbsp brown sugar
Cheesecake Filling
- 2 (8 oz) packages cream cheese, room temp
- ½ cup sour cream (or full-fat Greek yogurt)
- ¾ cup sugar
- 1 tsp vanilla extract
- 2 eggs (room temp)
Step-by-Step Instructions
Step 1: Prepare the Crust
Begin by preheating your oven to 325°F (160°C). This ensures the crust bakes evenly and firms up before you add the filling. In a medium-sized mixing bowl, combine your crust ingredients — whether you’re going with the nut-based crust (almond flour, coconut, coconut oil, maple syrup) or the cookie-based version (gluten-free graham crackers, butter, and sugar). Stir until the texture is like wet sand — it should clump when pressed between your fingers but not be too greasy.
Grab a 9-inch springform pan and pour the crust mixture into it. Use the flat bottom of a glass or measuring cup to press the crust evenly into the base of the pan. If desired, you can press some up the sides to create a more bakery-style edge. This not only looks great but helps hold the cheesecake together once sliced. For the perfect gluten free cheesecake recipe, this base creates the ideal structure.
Place the crust in the oven and bake for 10 minutes to lightly toast and set the base. This helps develop flavor and ensures it won’t get soggy from the filling. After baking, set the crust aside to cool completely on a wire rack. A warm crust can melt your filling and ruin the texture. That’s a common mistake first-time gluten free cheesecake recipe makers run into—so always cool completely.
Pro Tip: For extra crunch and flavor, bake the crust for 13 minutes instead of 10. Prefer no-bake? Just freeze the crust for 30 minutes while you prepare the filling. Easy, breezy, and oven-free!
Step 2: Make the Filling
Start by placing room-temperature cream cheese in a large mixing bowl. Room temp is essential—it mixes more smoothly and prevents lumps. Beat the cream cheese with a hand mixer or stand mixer on medium speed for 2–3 minutes until creamy and silky.
Next, add the sugar and beat again for another 1–2 minutes. Scrape down the sides of the bowl to ensure everything incorporates evenly. Mix in the sour cream (or Greek yogurt) and vanilla extract and beat until fully combined. These ingredients balance out the richness of the cream cheese and create that classic cheesecake tang. This step is crucial for achieving the perfect texture in your gluten free cheesecake recipe.
Now, the eggs: Add one egg at a time, mixing on low speed after each addition. Be gentle overmixing at this stage will incorporate too much air, which can lead to cracks as your cheesecake bakes and cools. The final batter should be smooth, thick, and pourable—no bubbles or foam. This gentle mixing method ensures your gluten free cheesecake recipe comes out silky, rich, and picture-perfect.
For best results, learn more about cream cheese handling to avoid lumps and ensure a silky-smooth filling.
Important Tip: Don’t skip scraping down the bowl between steps. Uniform batter = perfect texture. Overmixing is the #1 reason for cracked, dry cheesecake.
Step 3: Bake the Cheesecake
Once your filling is ready and the crust is cool, carefully pour the filling into the springform pan. Use a silicone spatula to smooth the top evenly. Gently tap the pan on the countertop a few times—this removes trapped air bubbles that can expand and crack the top during baking. This step is a subtle but important part of any gluten free cheesecake recipe to ensure a flawless top.
Place the pan in the center rack of your preheated oven (still at 325°F or 160°C). Bake for 45 to 50 minutes. The edges should look set and slightly puffed, but the center should still jiggle slightly when you give the pan a gentle shake. This jiggle is your signal: your cheesecake is set, but still moist inside.
Once baked, turn off the oven but don’t open the door fully. Instead, crack it slightly open and let the cheesecake rest inside for 1 hour. This slow cooling process helps prevent drastic temperature changes that lead to surface cracks. It’s a simple trick that separates a good bake from a great gluten free cheesecake recipe.
After the hour’s up, remove the cheesecake and let it cool completely at room temperature. Then, transfer it to the fridge and chill for at least 4 hours, preferably overnight. Chilling allows the flavors to meld and the texture to set to that perfect, creamy consistency.
Reminder: Don’t try to slice it too early! The longer the chill, the better the structure.
Optional: No-Bake Gluten Free Cheesecake Version
Short on time or don’t want to turn on the oven? Here’s how to make a no-bake version of this gluten free cheesecake that’s just as luscious. If you’ve never tried a no-bake gluten free cheesecake recipe, this one will quickly become your go-to.
Follow the same crust preparation but skip baking—just press the crust into the pan and freeze it for 30 minutes. While it chills, prepare the no-bake filling by combining room-temperature cream cheese, sugar, and vanilla extract. Beat until smooth.
Next, gently fold in 1 tablespoon of lemon juice (to help the filling set) and ½ cup of whipped cream (for lightness and stability). Once combined, pour the mixture into your frozen crust, spread it evenly, and smooth the top.
Cover the pan with foil or plastic wrap and place in the refrigerator for at least 6 hours, or until completely firm. No-bake versions benefit from patience—check for a solid set before slicing. This method proves that even a simple gluten free cheesecake recipe can deliver rich, creamy results without an oven.
For even more oven-free ideas, check out our collection of No Bake Gluten Free Desserts that are just as indulgent.
Extra Touch: Top with fresh berries, lemon zest, or crushed gluten-free cookies just before serving.
Preventing Cracks: Your Cheat Sheet
| Mistake | Solution |
|---|---|
| Overmixing | Mix just until combined |
| Sudden temperature change | Cool gradually in oven |
| No room temp ingredients | Always bring to room temp |
Infographic Idea: Add a visual “3 Steps to Crack-Free Cheesecake” to help users.
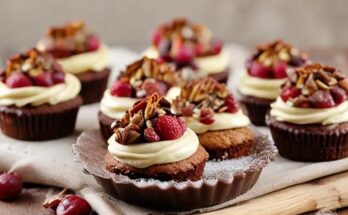
Topping Ideas
- Fresh berries + honey drizzle
- Lemon curd swirl
- Salted caramel & chopped pecans
- Chocolate ganache
Storage & Make-Ahead Tips
- Store in the fridge for up to 5 days.
- Freeze individual slices for up to 2 months.
- Thaw overnight in the fridge—texture stays perfect!
Nutrition (Per Slice, 12 servings)
- Calories: 362
- Protein: 6g
- Carbs: 26g
- Fat: 24g
- Fiber: 1g
Recipe development inspired by My Gluten-Free Kitchen and adapted to be beginner-friendly.
FAQs About Gluten Free Cheesecake
Q1: Can I make this dairy-free?
Absolutely! You can easily adapt this gluten free cheesecake recipe to be completely dairy-free without losing flavor or texture. Swap traditional cream cheese with vegan alternatives made from cashews or coconut oil. Replace sour cream with coconut yogurt, and use full-fat coconut cream instead of whipped cream for that silky richness. Just ensure all your ingredients are at room temperature before mixing—this makes a big difference in consistency. With these smart swaps, your dairy-free gluten free cheesecake recipe will be just as indulgent and crowd-pleasing as the original.
Q2: What’s the best gluten free crust alternative?
When making a gluten free cheesecake recipe, the crust is just as important as the filling. A popular crust option includes crushed almonds or almond flour mixed with maple syrup and coconut oil—it’s nutty, crunchy, and perfectly complements the creamy texture. Another favorite is gluten-free digestive biscuits or graham crackers combined with butter and a little sugar. If you prefer grain-free, try ground pecans and shredded coconut. Whichever you choose, the crust in your gluten free cheesecake recipe should hold together well and provide that satisfying contrast to every bite.
Q3: Why did my cheesecake crack?
Cracks are a common issue with any gluten free cheesecake recipe, but they’re usually easy to prevent. Overmixing the batter, baking for too long, or cooling the cheesecake too quickly are the top causes. To avoid this, gently mix the ingredients—especially after adding eggs—and stop as soon as everything is combined. Bake until the center has a slight jiggle, then cool the cheesecake slowly by leaving the oven door cracked for an hour. These careful steps ensure your gluten free cheesecake recipe bakes up smooth and beautiful without any unsightly cracks.
Q4: Can I use a hand mixer instead of a stand mixer?
Definitely! Whether you use a hand mixer or a stand mixer, you can still create a flawless gluten free cheesecake recipe. A hand mixer gives you more control and works perfectly for small batches. Just beat the cream cheese until smooth, then mix in the remaining ingredients on low speed to avoid adding excess air. Overmixing can lead to cracks, so gentle blending is key. No matter what mixer you use, your gluten free cheesecake recipe will turn out rich, creamy, and perfectly textured as long as you follow the proper mixing steps.
This gluten free cheesecake recipe is your answer to guilt-free indulgence. Whether you’re baking for a party, prepping in advance, or simply craving comfort food—this is the treat your table (and tummy) will thank you for.
What’s your favorite cheesecake topping combo? Share in the comments—we might feature your idea next!
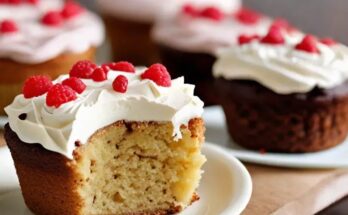
Love experimenting with desserts? Don’t miss our Easy Gluten Free Cakes – perfect for birthdays, parties, or anytime sweet cravings hit.